I woke up at my windows are still crying this morning. This happens almost every day to this time of year.
I live in a wooden bungalow built in the 1940s. There is insulation in the ceiling and walls, but we don’t know exactly what’s going on under the house – and frankly, we’re too afraid to check.
The windows are all original, good solid rimu frames in good condition, but they are single glazed.
Watch the video above.
LEARN MORE: Bubble wrap trick, Australian woman swears to keep warm
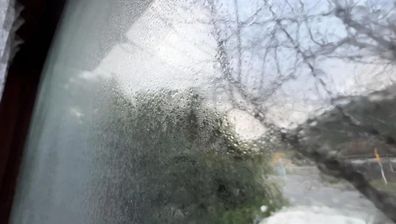
The result is a house which, while being healthy and of good quality, is a condensation nightmare.
Now, I don’t know about you, but I can barely save for a rainy day, let alone spend nearly $40,000 on double glazing for my entire house.
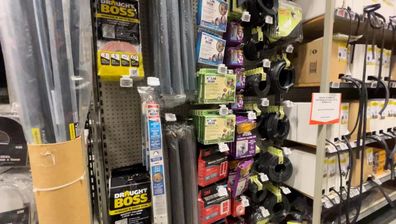
But a few years ago I came across a temporary solution that costs about $8 per window and can last up to three years.
For a daily dose of 9honey, Subscribe to our newsletter here.

10 tips to keep your home warm on a budget this winter
Self-installed insulation film costs about $5-8 per 5′ x 4′ window. It takes about half an hour to install, and while the box says it will last about two winters, I managed to install about three with the last box I used.
It is also very effective in minimizing, or even stopping, the weeping windows that accompany colder weather.
LEARN MORE: Why Your Towel Is Still Damp For Your Next Shower
So it’s an ongoing cost, but it’s still more achievable for me while I continue to save for double glazing.
Here’s how to set it up:
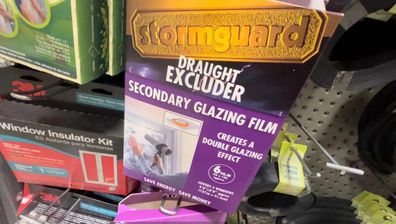
- Choose your product. There are many different brands on the market. They are all more or less in the same price range. I use a 3M Window Kitbecause it’s the one I used first and that I know well.
- Make sure your window is draft-proof. Get some self-adhesive rubber foam strips to seal the inside of any window that opens.
- Clean your windows and frames well and dry them thoroughly. You won’t be accessing them for the next two years and that stain you forgot will drive you crazy.
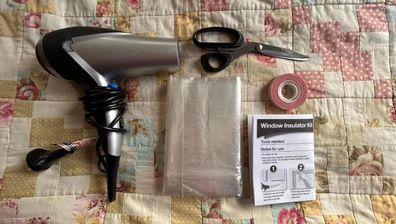
- Open the package and gather your tools. You will need very sharp scissors or a craft knife and a hair dryer. Do not use a heat gun, they are too powerful. In the box you will find a folded sheet of window film, a roll of double-sided tape and the instructions. Read them or at least look at the pictures.
LEARN MORE: A quick tip to eliminate condensation and prevent it from coming back
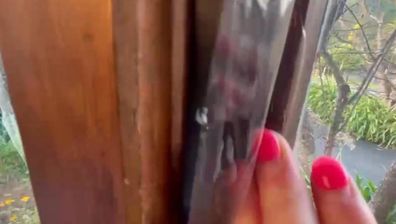
- Once you are ready, stick strips of double-sided tape to the edge that frames each pane. Once the edges are completely covered, tear off the backing. Do not leave any gaps in the corners, overlap the tape for better coverage.
- Partially unfold the folded film and measure the width you need, before cutting the film and opening it completely. This material is a little tricky to use, but be patient.
- While holding the film taut, tape it to the frame using double-sided tape. It doesn’t matter if it’s a little sagging, wrinkled, or has large sections that overlap the glued edge. Try not to have any creases on the glued edge, as this will allow air to leak in and out. You can gently lift and reposition the sections as you tape them.
- Once you are happy, take the hair dryer and warm up the plastic film, you will see the wrinkles and sagging disappear as the film shrinks and seals. Once finished it should be hard to tell there is even film, the window will be very clear and easy to see out.
READ MORE: Three Ways to Transform a Cold Winter Bathroom into a Cozy Retreat
- Carefully cut off excess film around the edges.
- Try not to touch or lean on the film once you’re done, as it may crack or tear and you’ll have to reapply it. But once you’re done, you should see a difference in the condensation.
Congratulations, your windows should be sorted for the year!
This story was originally published on Stuff and has been republished with permission. Read the original here.
FOLLOW US ON WHATSAPP HERE: Stay up to date with the latest celebrity, lifestyle and opinion news via our WhatsApp channel. No comments, no algorithm and no one can see your private information.