[ad_1]
Setting up your first NAS system can be a daunting process that often ends up in the “too hard” bin. Now there’s a basic entry-level NAS system that’s incredibly easy to set up in under 10 minutes and works instantly with a built-in phone app.
While he is enough While it’s easy to set up a full-fledged NAS system such as the excellent 2-bay Synology DS224+, or DS723+, or the 4-bay DS923+, you’ll usually need to buy and install your own hard drives and have moderate to low “technical know-how” to set it up and get it working.
You’ll also need to familiarize yourself with Synology’s market-leading proprietary Disk Station Manager (DSM) software, which is a real asset for power users, but many people won’t find it necessary for casual use.

and then you can view them on your computer’s big screen. Image: Tim Levy
To make things even easier (for non-techies), Synology has released the BeeStation, which is competitively priced at $400-$450, comes pre-installed with a 4TB hard drive, and is VERY easy to set up. It features a Realtek RTD1619B processor with 1GB of DDR4 memory, and its own proprietary BeeStation operating system.

way to save and share your photos
Unlike regular Synology NAS systems with DSM, you don’t need to add port forwarding on your router, nor start messing around with SSL certificates: everything is handled in the background by BeeStation OS.
You can have up to eight other users with their own BeeStation accounts. This is a benefit in that instead of paying for separate annual accounts, which can cost anywhere from $30 to $150 per year per user (Google Drive), you only have one purchase with the BeeStation. Be aware though, this is a single hard drive, so there is no redundancy/failsafe built in like a RAID system or a larger multi-drive NAS system.
Is it easy to install?
Easy, you might say? I was able to install it in less than 15 minutes (not including the time to update the software). If I hadn’t documented the installation, I think I could do it in less than 10 minutes, including installing the power supply and preparing a location for storage.
The easiest way to set up the system is to use your phone. To preview or see how easy it is, you can click on the images at the top of this page to see the steps, although it’s as easy as doing everything on your own phone by following the instructions.
Hardware Installation
You will be installing the BeeStation next to your router, wherever it is. So make sure you have some space for it, preferably next to the router, and leave enough room for air circulation. Plug in the power supply and connect the cable that goes to the router. The Beestation has a cooling fan that is quiet when charging, but it turns off when it is idle.
Software Installation (Idiot’s Guide)
1) Using your phone, use the camera to scan the QR code located on the bottom of the BeeStation
2) Follow the instructions on your phone.
Software Installation (Extended Version)
1) Using your phone, ask the camera to scan the QR code located on the bottom of the BeeStation. This will open the BeeStation portal.
2) Sign up/log in to your Synology account and check the User Agreement.
3) Connect the BeeStation to your router and plug in the power supply
4) Turn on the device and wait for the light to change from white to orange.
5) The BeeStation prepares and updates automatically (it may take up to 15 minutes to update the software)
6) Name your BeeStation – it is now ready.
7) To upload photos from your phone to BeeStation, it is best to use the BeeFiles app. So download it from the App Store.
8) If you are on a computer, you can access the folders by logging in to Synology BeeStation online. There’s no real need to worry about memorizing the URL. If you type Synology BeeStation into Google, it’s the first thing that comes up.
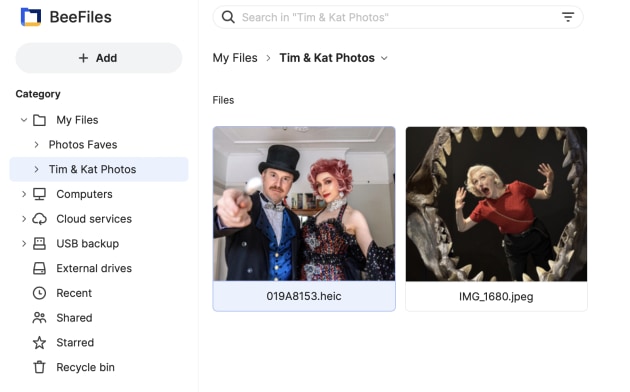
You can now upload images or files from anywhere on the planet. There are two places to upload your files: BeeFiles and Bee Photos. BeeFiles is primarily for files, although you can of course add photos. It works like any other folder/file system on your computer. BeePhotos has albums where you store photos, but it also has face recognition and topics to help you find specific images faster.
The summary
As most savvy (and diligent) photographers know, it’s important to keep your backed-up work in at least three places. While it’s a good idea to archive your own work in one place (e.g. your home or office), you may want to consider storing all of your favorite or most valuable work off-site, either in a cloud system or a NAS. This is where the BeeStation is a good, cost-effective solution for professionals who want an off-site system at another family member’s home or even a friend’s office.
The BeeStation isn’t a full-fledged NAS system with multiple drives and a powerful processor, which is reflected in its low price. It’s a great entry-level way to have your own cloud, making it easy to back up and archive your work. I don’t think it’s for power users who are constantly uploading hundreds of photos a day. You’ll need to spend over $1,000 for something like that.
I also enjoyed using the BeeFiles app on my phone so I could not only save the images to my own hard drive, but also easily view them on my computer with a large screen.
In summary, this is a great entry-level NAS system that is easy to use and has great integration via a phone app. But if you are an advanced user, you will need to look at other NAS systems such as the Synology DS923+ 4-bay ($920 without hard drives) or Synology DS1621+ 6-bay ($1,450 without hard drives).
You can learn more about the BeeStation on the Synology website.

although it can be installed anywhere where cables can reach.